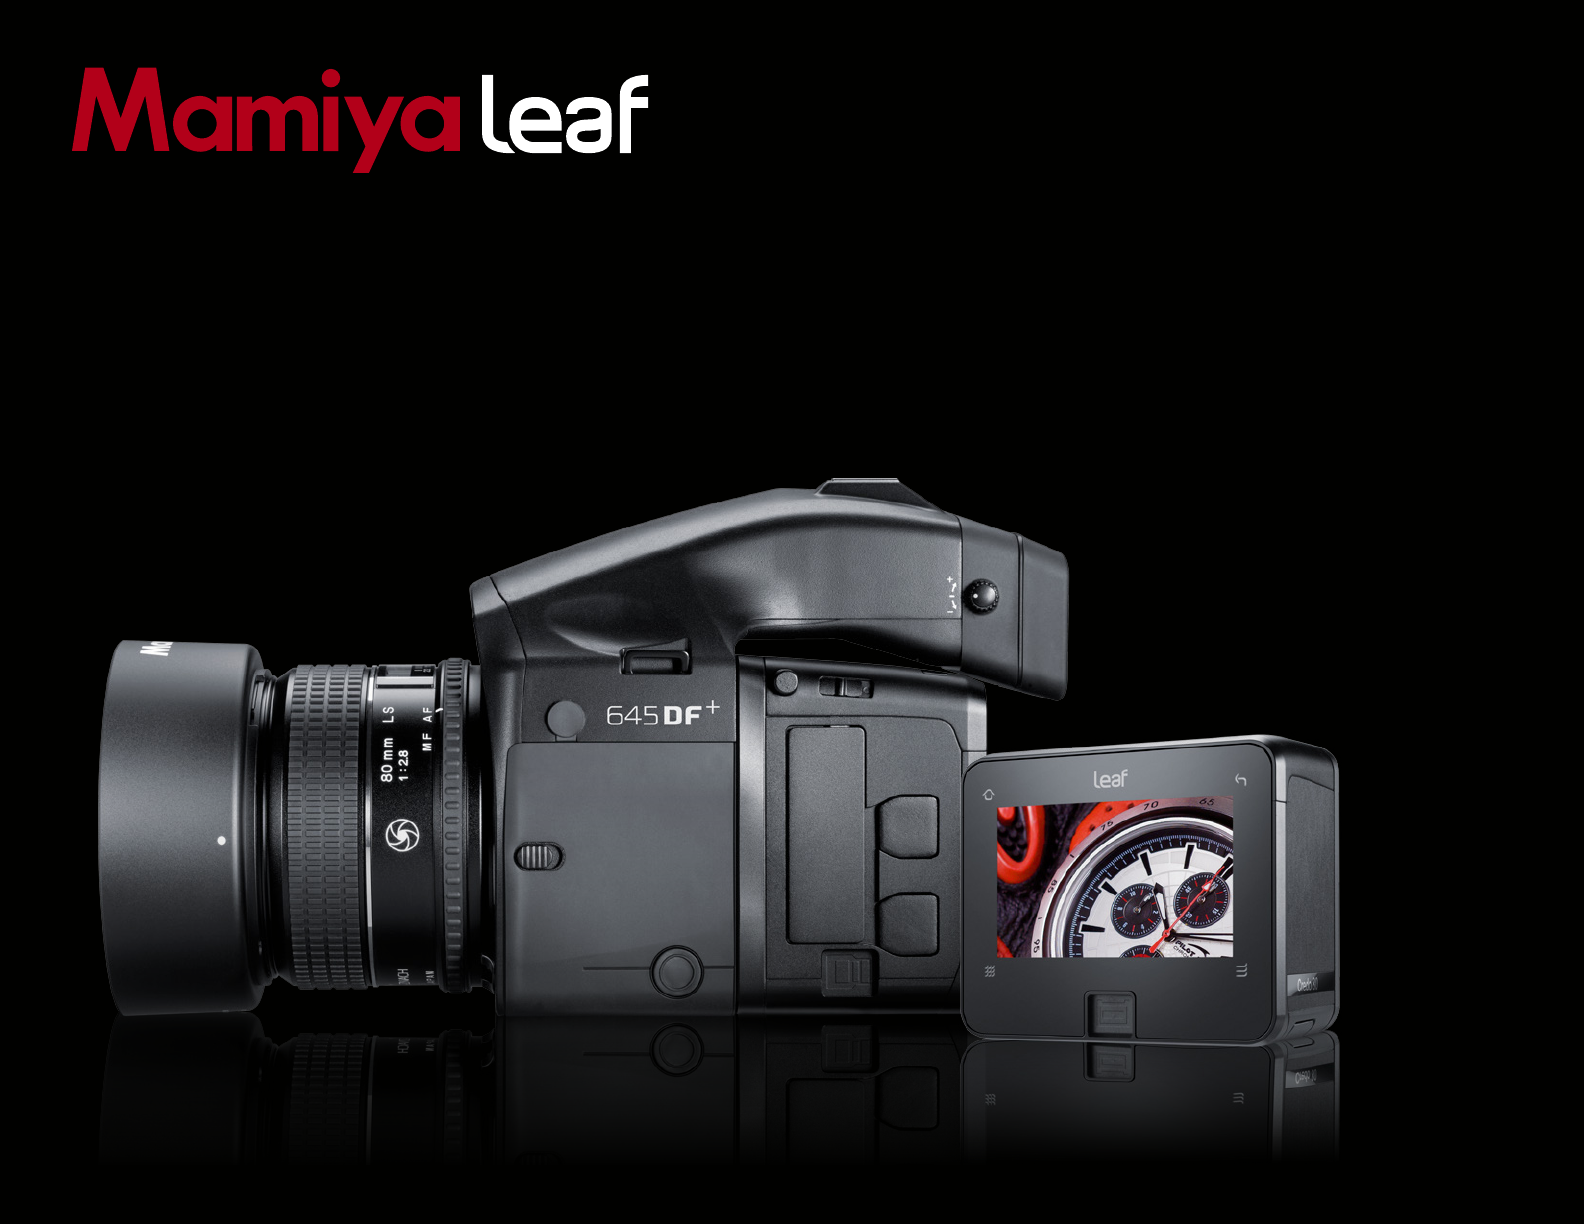
Mamiya 645DFplus Uživatelská příručka
Procházejte online nebo si stáhněte Uživatelská příručka pro Bridge kamery Mamiya 645DFplus. Mamiya 645DFplus User guide Uživatelská příručka
- Strana / 149
- Tabulka s obsahem
- KNIHY

- User Guide 1
- On Rights 2
- On Liability 2
- Contents 3
- 7.0 Settings Menu 70 4
- 9.0 Advanced 645DF 4
- Camera Functions 87 4
- 19.0 Live View 141 6
- 20.0 Appendix 148 6
- 1.0 Introduction 7
- 1.1 Warranty 8
- 1.3 Activation 9
- 1.4 Screen Calibration 10
- 2.0 The 645DF 11
- Camera 11
- 2.2 Batteries for Camera 12
- 2.3 Sleep Mode 13
- 2.4 Attach and Remove a Lens 14
- 2.5 Adjusting the Strap 15
- 2.8 The Displays 18
- 2.10 The Buttons on the Back 20
- 2.11 LED Lights 20
- 2.12 Setting Date and Time 21
- 2.13 Setting Diopter 21
- 2.14 Eyepiece Shutter 22
- 3.0 Basic Functions 24
- Metering modes 25
- Exposure Warnings 27
- 3.5 Focus Modes 28
- Single Focus Mode (S) 29
- Continuous Focus Mode (C) 29
- Manual Focus Mode (M) 29
- When Auto Focus Fails 30
- AF Assist Infrared Light 31
- 3.8 Drive Dial 32
- 3.9 Exposure Modes 33
- Aperture Priority AE (Av) 34
- Shutter Priority AE (Tv) 34
- Manual Mode (M) 35
- 3.10 Flash Photography 38
- Metz 3952 functions 39
- TTL flash 40
- Example: 40
- Curtain Sync 40
- Viewfinder LCD Readouts 41
- Metz units 42
- 4.0 Introduction to the 44
- Credo Series Digital Back 44
- 4.2 General Hardware Setup 46
- 4.3 Indicator Light 47
- 4.4 CF Card LED 47
- Driver Set-up 48
- Connecting 48
- Online Support 49
- 4.6 CompactFlash Card Usage 50
- How does 3S work? 51
- Disk Check Summary 51
- Warning! 52
- 5.0 Navigating the Credo 53
- User Interface and Menu 53
- 5.1 Soft Buttons 54
- 5.2 Touchscreen Operation 55
- 5.3 ISO 56
- 5.4 White Balance 57
- 5.5 Custom White Balance 58
- 6.0 Browse Mode 59
- 6.1 Browse Mode Views 60
- 6.2 Dynamic Menu 61
- 6.3 Info Bar 62
- 6.4 Browse Mode Navigation 62
- 6.5 Zoom 62
- 6.6 Rating Images 63
- 6.7 Deleting Images 63
- 6.8 Deleting in Browse View 64
- 6.9 Grid 65
- 6.10 Tools 67
- Orientation 68
- File Info 68
- Exposure Warning 69
- 7.0 Settings Menu 70
- 7.1.1 Setup C1, C2 or C3 71
- 7.1.2 Exposure Program 71
- 7.1.3 AF Area 71
- 7.1.4 Light Metering 71
- 7.1.5 Custom Function Set 72
- 7.1.6 Setup Custom A, B or C 72
- 7.1.7 EV Step 72
- 7.1.8 Lens Change 72
- 7.1.9 Sleep Timer 72
- 7.1.10 Battery Type 73
- 7.1.11 Bracketing 73
- 7.1.12 Front/Rear Dial 73
- 7.1.13 Rear Dial in P mode 73
- 7.1.14 Dial Direction 73
- 7.1.15 AEL/AFL button 74
- 7.1.16 Release Button 74
- 7.1.17 AEL 74
- 7.1.18 AFL 75
- 7.1.19 M-Mode AEL 75
- 7.1.20 AF Assist Light 75
- 7.1.21 Flash Sync 76
- 7.1.22 Beep 76
- 7.1.23 Shutter in Tv/Av/P 76
- 7.1.24 Shutter in M/X 77
- 7.1.25 AF priority 77
- 7.1.26 Active Custom Set 78
- 7.1.27 Restore to Default 78
- 7.1.28 About System 78
- 7.2 Power Management 79
- 7.3 Format Card 80
- 7.4 Check Disk 80
- 7.5 Storage Mode 80
- 7.6 File Format 81
- 7.7 Camera Mode 81
- 7.8 Shutter Latency 81
- 7.9 Image Orientation 81
- 7.10 Auto Preview Mode 82
- 7.11 Display 82
- 7.12 Ready Beep 83
- 7.13 Date and Time 83
- 7.14 Language 83
- 7.15 Restore to Default 84
- 7.16 Firmware 84
- 7.17 About 85
- Camera Functions 87
- 9.2 AE Lock 88
- 9.4 Auto Bracketing 90
- Single-Frame Mode (S) 91
- Continuous Mode (C) 91
- Cancelling Auto Bracketing 91
- In the Manual Mode 92
- 9.6 Mirror Up Delay 93
- 9.8 Camera Display Light 94
- 9.10 Self-Timer Mode 96
- 9.11 Interval Photography 97
- 9.12 Depth of Field 98
- 9.13 Infrared Photography 99
- 9.14 Custom Function 100
- C-98 Lens firmware version 103
- C-99 Body firmware version 103
- Liquid Crystal Display 103
- 9.17 Lenses and Multi-Mount 106
- 10.0 Maintenance 107
- 10.2 Battery Socket 108
- 10.5 Lens Maintenance 110
- 10.6 Back Maintenance 110
- 10.7 IR Filter on the CCD 110
- 10.8 Mamiya 645DF 111
- Camera Body Specifications 111
- 10.9 Mamiya 645DF 112
- Housing Specification 112
- 11.0 Software 113
- 12.0 End User Support 114
- 12.1 Web Resources 115
- 13.0 Open Platform – 116
- Freedom of Choice 116
- Cameras 117
- 14.0 Leaf Credo back for 118
- Mamiya RZ67 PRO IID 118
- Installing a Viewfinder Screen 119
- Mode Selector 120
- Mirror Up 120
- Double Exposure 120
- 15.0 Leaf Credo back for 121
- Hasselblad V Series 121
- Insert a Viewfinder Mask 122
- Sync Cable 123
- Flash Lead Connection 123
- Tethered Capture 123
- 15.4 Hasselblad 555 ELD 124
- 15.5 Hasselblad 553 ELX 125
- Shutter Latency Setting 126
- 16.0 Leaf Credo Back for 128
- Hasselblad H Series 128
- 16.2 Viewfinder Masking 129
- Camera Display 130
- ISO Settings 130
- Auto Exposure 130
- Viewfinder Information 131
- Double Exposure Protection 131
- Image Orientation 131
- 17.0 Leaf Credo back for 133
- Contax 645 133
- 17.2 Viewfinder Masking 134
- 17.3 More Details: Contax 645 135
- 17.4 Flash Lead Connection 136
- (Gold package only) 137
- 18.0 Leaf Credo Back on 138
- View Cameras 138
- 18.1 Using the 2-shot Release 139
- 18.2 Using the 1-shot Release 139
- Adapters 140
- 19.0 Live View 141
- 19.1 Starting Live View 142
- 19.2 White Balance 143
- 19.3 Quality and Brightness 143
- 19.4 Zoom 144
- 19.5 Grid 144
- 19.6 Auto Stop and Start 144
- 19.7 Accessories 145
- 19.8 Live View Camera Support 146
- Hasselblad V 147
- Mamiya RZ67 Pro IID 147
- 20.0 Appendix 148
Shrnutí obsahu
User GuideCredo Digital BacksMamiya 645DF+/645DF Camera
101.4 Screen CalibrationHaving a properly calibrated monitor is a critical factor when viewing images. Ensure that the digital viewing conditions are
1009.14 Custom FunctionThe custom functions can store three different camera set-ups. When at C-00, choose 1 (A), 2 (B), or 3 (C) to store a specific
1019.15 Types of Custom FunctionsC-00 Custom functions profile [SEL]0: None (default=0) 1: A 2: B 3: C When 0 has been selected and set, none of the cu
102C-11 AEL function lock/unlock mode [AEL]Used to set the method of operating the AEL button to lock AE. At the default setting, when the AEL button
103C-97 Support for Mamiya ZD backsThis function should ONLY be activated when shooting on a Mamiya ZD back.0: Default setting NO Mamiya ZD back on th
104Custom Functions Overview (most can also be set from the back as well)No. Item Initial setting (0) 1 2 3C-00 Custom Function User Last used User A
1059.16 Custom Dial Modes C1, C2 or C3Mode dial options C1, C2 and C3 can be used to store preferred settings.These settings can be changed instantly
1069.17 Lenses and Multi-MountWhen it comes to lenses, Mamiya Leaf provides the widest range of possibilities to ensure photographers get the most cre
10710.0 MaintenanceThe Mamiya 645DF+ generally needs very little maintenance. But this is a professional tool and should be treated with care and caut
10810.2 Battery SocketNever leave batteries in the socket if the camera or back is not going to be used for long periods of time. Keep contacts clean
10910.4 Camera Display Error-NotificationWhen Any of These Displays Appear...LCD Display Causes and remediesMain LCD PanelViewfinder LCD readoutsMagazin
112.0 The 645DF+ Camera and Credo Digital Back SystemThe Mamiya Leaf Camera system is created to provide as much flexibility and openness as possible.
11010.5 Lens MaintenanceNever touch the inner optics of the lens with your fingers. Keep the inner optics perfectly clean with air, a lens brush or th
11110.8 Mamiya 645DF+ Camera Body Specifications• Open platform for maximum choice and compatibility• Durable, proven platform for secure operation
11210.9 Mamiya 645DF+ Housing SpecificationCamera type 6 x 4.5 cm format, electronically controlled focal plane shutter, TTL multiple mode AE, AF sing
11311.0 SoftwareCapture One Pro is a professional RAW converter and image editing software. It contains all the essential tools and high-end performan
11412.0 End User Support PolicyMamiya Leaf guarantees world class support and service with every purchased product. Check www.mamiyaleaf.com for the
11512.1 Web ResourcesMamiya Leaf offer users a host of online resources to inspire, enthuse and inform. Find detailed information including User Guide
11613.0 Open Platform – Freedom of ChoiceMamiya Leaf’s Open Platform policy delivers maximum choice and compatibility with a wide range of different
11713.1 More Details: Leaf Credo and Mamiya 645 Series Cameras Power Management and Shutter LatencyThe Credo CCD is put to sleep to reduce power consu
11814.0 Leaf Credo back for Mamiya RZ67 PRO IIDThe Leaf Credo backs are compatible with the Mamiya RZ67 PRO IID with the use of an adapter plate. The
119The image area of the Mamiya RZ67 Pro IID at 56 x 69.5 mm is larger than the size of the three Credo models’ sensors so it is necessary to insert a
122.2 Batteries for CameraSet the shutter release mode selector lever to L (to turn the power off).Use the Mamiya Li-Ion rechargeable battery pack, s
12014.3 More Details: Mamiya RZ67 Pro IIDMode SelectorThe mode selector on the trigger button should be turned to the white dot when used with the Lea
12115.0 Leaf Credo back for Hasselblad V SeriesThe Leaf Credo back can be mounted on a wide range of Hasselblad cameras including Hasselblad 555 ELD,
12215.2 Mounting a Viewfinder Mask on a Hasselblad V Series CameraThe image area of a Hasselblad V camera body (approximately 6 x 6 cm) is a different
12315.3 More Details: Hasselblad V SeriesSync CableA sync cable is always connected from the lens to the small connector in the front plate on either
12415.4 Hasselblad 555 ELDEnsure that the shutter release on the front of the Hasselblad 555 ELD is in the DIG position when using a Leaf Credo back.I
12515.5 Hasselblad 553 ELXWhen using the Leaf Credo back on some Hasselblad motorized bodies (e.g. Hasselblad ELX or Hasselblad ELM series), a motor c
12615.6 Hasselblad 501 CM and 503 CW without WinderThe Leaf Credo back can also be used with mechanical Hasselblad cameras such as the 501 CM and 503
12715.8 Cables shipped with Leaf Credo back for Hasselblad V Classic and Value Added backs come with all the cables needed for the specific camera plat
12816.0 Leaf Credo Back for Hasselblad H SeriesThe Leaf Credo (H-mount) digital back is designed specifically for Hasselblad H1 and H2 cameras. 16.1 M
12916.2 Viewfinder MaskingThe image area of the Hasselblad H1/H2 cameras is 56 x 41.5 mm. A viewfinder mask is only needed for the smaller size of the
132.3 Sleep ModeThe camera’s power is switched on when the shutter release mode selector is set to S, C or M.UP. In order to prevent the camera’s bat
13016.3 More Details: Hasselblad H SeriesCamera DisplayThe Hasselblad H1/H2 incorporates a screen that displays information about the camera set-up. I
131Viewfinder InformationThe viewfinder information bar is located below the image area within the viewfinder display. It displays the camera’s exposure
132Flash Lead ConnectionA flash cable is always connected to the Hasselblad H1/H2 camera body.The flash sync cable must not be connected to the camera b
13317.0 Leaf Credo back for Contax 645The Leaf Credo (Contax mount) digital back is designed specifically for the Contax 645 camera. The Leaf Credo ba
13417.2 Viewfinder MaskingThe image area of the Contax 645 camera is 56 x 41.5 mm. A focusing screen is only needed for the smaller size of the Credo
13517.3 More Details: Contax 645Exposure ModesThe Contax 645 manual (M) and semi-auto exposure modes (Av, Tv) are fully supported by the Leaf Credo ba
136TTL flashUsing TTL flash with the Contax 645 camera and Leaf Credo back results in a two f-stop overexposure. When using TTL flash, the exposure compe
13717.5 Cables Shipped with Leaf Credo back for the Contax 645 (Gold package only)Part# 50300143 Multi-connector to Lens sync (for use with large for
13818.0 Leaf Credo Back on View CamerasThe Leaf Credo back is compatible with most technical view cameras and large format cameras via camera interfa
13918.1 Using the 2-shot ReleaseThe Leaf Credo back can be used with mechanical shutters that can be fired twice within four seconds. The first release
142.4 Attach and Remove a Lens1. Remove the front body cap in the same way that you would remove a lens; push the lens release button A backward and
14018.3 Shutter Latency Settings for Technical Camera AdaptersTechnical camera adapters for the Leaf Credo back can be used with both normal and zero
14119.0 Live ViewThe Live View function is intended for use when a camera is mounted on a tripod and the subject is stationary.Live View is ideal for
14219.1 Starting Live View1. Live View is accessed from the Camera Settings menu (circled left).The Camera Settings menu is always visible on the Hom
14319.2 White Balance1. After selecting the White Balance Picker, tap the screen to select a neutral area to calibrate the Live View. 2. If a preci
14419.4 ZoomZoom into the Live View by sliding a finger up in the left side of the screen. Double tap on the image to bring up a 100% view. If a zoom i
14519.7 AccessoriesLive View is easily overexposed due to the high sensitivity of the Credo CCD sensor and its large size. It is sometimes necessary t
14619.8 Live View Camera SupportThe Leaf Credo back Live View function is supported on both medium and large format view cameras. Find out how to oper
147Hasselblad V1. Activate Live View on the Leaf Credo back. 2. Select B (Bulb) mode.Mamiya RZ67 Pro IID1. Activate Live View on the Leaf Credo bac
14820.0 AppendixFirmware CreditsLibjpegThis software is based in part on the work of the Independent JPEG Group.zlibInterface of the ‘zlib’ general pu
http://www.mamiyaleaf.com© 2012 65301597-A CREDO MAMIYA USER GUIDE V1.20
15Attach a Leaf Shutter LensLeaf shutter lenses are equipped with an internal shutter. Leaf shutter lenses are capable of high shutter speeds 1/800 se
162.6 Attaching the Leaf Credo BackThe Leaf Credo back is fully integrated with the camera body and functions as a part of the whole camera system. E
172.7 Parts of the Camera SystemRubber Eye PieceDigital BackAuto Exposure Lock ButtonAEL Exposure Metering buttonSelf-timer ButtonInterval ButtonMain
18During actual use, only the relevant icons and indicators are displayed.During actual use, only the relevant icons and indicators are displayed.2.8
19Liquid Crystal DisplayDue to the limitations of the space and letters, words and letters on the LCD are abbreviated.Display examples of the main LCD
2On Rights©2012-2014 Leaf Imaging Ltd. All rights reserved. Colorspace images created in CROMiX ColorThink.On LiabilityThe information in this User Gu
202.10 The Buttons on the BackThe Credo is equipped with four soft buttons. The buttons change function to match the menu shown on the screen. 2.11 LE
212.12 Setting Date and TimeDate and time parameters are set and controlled via the Leaf Credo back’s Menu system. If the Leaf Credo back has been wit
22Replacing the Diopter Correction Lens1. Press the Eyepiece Lock, which is located in a gap between the Eyepiece and the Diopter Correction lens. (T
23
243.0 Basic FunctionsISO and White BalanceThe Leaf Credo back’s Home screen enables quick access to the ISO and white balance (WB) settings by tappin
253.3 Setting the Shutter Release, Focus, Exposure and Metering modes1. Set the Shutter Release mode selector lever to S (single-frame advance mode)
26P: Program AE — The aperture and shutter speed are determined automatically for the optimum exposure, according to the ambient light conditions. Thi
273.4 Measuring Light – Exposure Metering1. Press button A to adjust the exposure metering mode. There are three different exposure metering mode opt
283.5 Focus ModesTo use the Auto Focus function, both the camera body and the lens have to be set to their respective Auto Focus modes. Auto Focus do
29Single Focus Mode (S)This mode uses the focus-priority mechanism. The shutter can be released when the focus mark • in the viewfinder is illuminated.
3Contents1.0 Introduction 71.1 Warranty 81.2 Installation and Activation of Software 81.3 Activation 91.4 Screen Calibration 102.0 The 645DF+
30Manual Focusing using the Focus Mark (Focus confirmation method)Half-press the shutter release button and turn the lens focusing ring to focus on the
313.7 Using Focus Lock and Infrared FocusingUse the focus lock when your intended focus point is not within the focus frame. In such cases where a su
323.8 Drive DialSingle-Frame ModeOne photograph is taken each time the shutter release button is pressed.Set the shutter release mode selector to S.C
333.9 Exposure Modes(P) Program AEThe aperture and shutter speed are determined automatically for the optimum exposure, according to the ambient ligh
34Notice:The shutter speed value blinks when the subject is too dark or too bright for a correct exposure. To obtain the correct aperture, adjust the
35Notice: When the exposure is compensated in the Manual mode, the difference between the metered value and the compensated value is displayed on the
36One-push Shift FunctionWhen the difference between the set value and metered value is displayed on the viewfinder LCD in the Manual M mode, press the
37Exposure Mode Lens ModeShutter speed X-Sync1/4000 – 1/800 1/800 – 1S 1S – 30S+ 1/4000 – 1/800 1/800 – 1S 1s – 30S+Program Leaf Shutter — LS — — LS
383.10 Flash PhotographyThe Mamiya 645DF+ is equipped with a vertical-travel focal plane metal shutter and it is also compatible with leaf shutter le
39Mamiya 645DF+ features Through the Lens (TTL), Off the Film/Sensor (OTF) and electronic flash exposure metering. A flash sensor located inside the cam
46.4 Browse Mode Navigation 626.5 Zoom 626.6 Rating Images 636.7 Deleting Images 636.8 Deleting in Browse View 646.9 Grid 656.10 Tools 67
40TTL flashWith TTL flash photography, the reflection of the flash is metered and the intensity of the flash is adjusted automatically, which can mean TTL
413.11 Flash Compensation SettingsBy combining a Metz flash and the SCA 3952 adapter, the camera adjusts for flash. It can be adjusted within ±3EV in in
42Flash Photography with Electronic Flash Models other than Metz units1. To use a grip type flashgun or a strobe with electric contacts other than an
444.0 Introduction to the Credo Series Digital BackSystem OverviewThe Leaf Credo series digital back is designed to fit on the Mamiya 645DF+ as well a
454.1 Quick Start (shooting untethered)1. Connect a Leaf Credo digital back to the camera and install the focusing screen if applicable.2. Charge t
464.2 General Hardware SetupPowering up the Leaf Credo backAfter a Leaf Credo back is connected to a camera body, insert a battery, USB 3.0 or FireWi
474.3 Indicator LightCredo series digital backs feature an indicator LED located beside the on/off button. When the Leaf Credo back is in sleep mode,
484.5 Tethered and Untethered OperationsUntethered: A Leaf Credo series back can be operated as a fully portable battery powered unit. Image files are
49Tethered Operations Continued The display on a Leaf Credo series back can be either be turned off while shooting tethered or set to display the imag
59.7 Bulb Mode and Long Exposure 949.8 Camera Display Light 949.9 Front/Rear Dial Lock Mechanisms 959.10 Self-Timer Mode 969.11 Interval Phot
504.6 CompactFlash Card UsageIt is important to follow a few simple guidelines to help avoid loss of data when working with CompactFlash cards, card
514.7 Secure Storage System (3S)You can always be sure that your data is safe when working with memory cards in a Leaf Credo back. The Mamiya Leaf Se
524.8 Formatting your Memory CardMost CompactFlash cards are preformatted and ready for use in the Leaf Credo backs. However, Mamiya Leaf recommends
535.0 Navigating the Credo User Interface and Menu System Home ScreenThe Credo Home screen is the first view that you see as soon as the back is switc
545.1 Soft ButtonsThe Leaf Credo back is equipped with four soft buttons. The four virtual buttons are Home, Browse, Back and Dynamic Menu options.Th
555.2 Touchscreen OperationAll three Credo models incorporate a newly designed 3.2 in touchscreen. The screen lets you zoom, pan and browse through i
565.3 ISO Tap the ISO icon on the Home screen. You are presented with the back’s ISO spectrum. Tap the screen to select the desired setting. A green f
575.4 White BalanceTap the WB icon on the Home screen. You are presented with the back’s white balance settings. Scroll left and right and tap the sc
585.5 Custom White BalanceTo create a new custom white balance, first capture a reference white balance image. (Try to use a gray card or neutral whit
596.0 Browse ModeBrowse mode is used to review captured images. Its touchscreen interface makes it easy to delete, zoom, pan and browse through image
618.2 Using the 1-shot Release 13918.3 Shutter Latency Settings for Technical Camera Adapters 14019.0 Live View 14119.1 Starting Live View 1421
606.1 Browse Mode ViewsTap the Browse soft button to view images on the CompactFlash card. There are three Browse mode views: Full Screen, Tool View
616.2 Dynamic MenuPress the Dynamic Menu button in the lower corner of the back.The Full Screen Dynamic Menu features Grid, Custom White Balance Pick
626.3 Info BarThe bottom of the screen features an Info Bar that displays a Power Indicator that shows the remaining battery capacity. The Power Indi
636.6 Rating ImagesTo turn on Rating, tap the bottom right Dynamic soft button then tap the Rating icon. A white bar appears at the bottom of the scr
646.8 Deleting in Browse ViewLong press a thumbnail to select it for deletion. A small red trash icon appears in the top left corner of the selected
656.9 Grid Select the Dynamic Menu and choose the (circled) icon to overlay a grid on captured images in Full Screen and Tool View modes. Tap the Grid
66The Grid Mode provides numerous style combinations. The Rectangular option can be configured to display up to 10 horizontal and vertical lines. In th
676.10 Tools Browse mode features four Tools to aid in the capture and review of images. The Tools include Exposure Histogram, Exposure warning, File
68OrientationThe Orientation tool helps keep the attached camera in a perfect horizontal or vertical position. Tap the Orientation tool at the bottom
69Exposure WarningThe Exposure Warning tool highlights areas of a captured image that are overexposed. Tap the Exposure Warning tool to display any bu
71.0 IntroductionThank you for choosing a Mamiya Leaf product.The Mamiya 645DF+ and Leaf Credo digital back is the most powerful digital camera soluti
707.0 Settings MenuThe Settings Menu can be accessed by tapping the lower left button on the Home screen.The Settings Menu can be navigated by using
717.1 Camera Settings (Custom Functionality) Pages 72 - 79 deal with the Mamiya 645DF+. Skip to the next section on page 80 if you are using your Cre
727.1.5 Custom Function SetAssign the letter A, B or C to the chosen exposure mode settings in the Custom Function Set menu. Note: It is possible to
737.1.10 Battery TypeThe Mamiya 645DF+ can be powered by three different battery types. Select the battery type that you want displayed on the extern
747.1.15 AEL/AFL buttonSwap the operations of the front and rear AEL (Auto Exposure Lock) and AFL (Auto Focus Lock) buttons. Find out the location of
757.1.18 AFLSet the function of the AF Lock button with one of the following options:While Pressed: Press the AFL to lock focus once. AF operation: Th
767.1.21 Flash SyncThe Flash Sync (synchronization) can be altered to fire at the beginning (First Curtain) or the end (Second Curtain) of an exposure
777.1.24 Shutter in M/XThis menu is applicable when a Mamiya 645DF+ camera is used in either M or X exposure modes with a leaf shutter lens. Using th
787.1.26 Active Custom SetSelect the desired Custom Set for use. 7.1.27 Restore to DefaultSelect Restore to Default to clear and reset all the curre
797.2 Power ManagementThe Power Management menu option has three criteria to help preserve battery life and help keep operating temperatures low when
81.1 WarrantyPlease read the warranty certificate found in the Quick Guide. Should any problem occur, contact your local dealer (place of purchase) to
807.3 Format CardSelect Format Card to erase all data on a memory card. Memory card formatting is done in either FAT 16 or FAT 32 depending on card s
817.6 File FormatA Leaf Credo back can save files in two different Raw formats; IIQ L and IIQ S. IIQ stands for Intelligent Image Quality Raw. IIQ L
827.10 Auto Preview ModeThe Auto Preview option can be switched On or Off. Select On to revert to a Browse mode when shooting. Select Off to remain on
837.12 Ready BeepThe Leaf Credo back emits a small audio beep after every capture is taken. This Ready Beep signals that a capture has been completed
847.15 Restore to DefaultSelect Restore to Default to restore the Credo unit back to its default factory settings. Tap OK to confirm restore. Caution!
85Restore FirmwareSelect Restore Firmware to revert to the factory firmware version. (Camera settings are not affected). Dump LogSelect Dump Log to tra
879.0 Advanced 645DF+ Camera Functions9.1 Exposure CompensationIn situations providing extreme high contrast, the resulting photograph may be under
889.2 AE LockThe AE lock function is useful in a number of shooting scenarios, but is particularly useful when capturing panoramic images where a con
899.3 Metered-Value Difference IndicatorKeep pressing the AEL button A and the difference between the metered exposure value and the exposure of the
91.3 ActivationAn Internet connection is needed to activate and update Capture One. Upon launching of Capture One, an Activation dialog box appears.
909.4 Auto BracketingAuto Bracketing can be used when it is difficult to determine your exposure compensation value. This function automatically capt
91Single-Frame Mode (S)Press the shutter release button for each shot. The camera meters adequate exposure value for each shot and performs Auto Brack
929.5 Taking Photos with the Mirror UpThis function prevents mirror-caused vibrations which may blur an image when shutter speed is slow. An electrom
939.6 Mirror Up DelayTo change from the Self-timer to the Mirror Up setting, press the shutter button so the mirror goes into the upright position. O
949.7 Bulb Mode and Long ExposureTo make an exposure longer than 30 seconds, adjust the shutter speed to B (Bulb). In order to prevent camera shake,
959.9 Front/Rear Dial Lock MechanismsWhen the Electronic Dial Lock is On, all currently set values in Av (Aperture Priority AE), Tv (Shutter Priority
969.10 Self-Timer ModeThe default setting for the Self-timer mode is to release the shutter 10 seconds after the shutter release button is pressed. T
979.11 Interval PhotographyInterval photography can be used for a variety of shooting scenarios such as capturing cloud movements or a flower coming i
989.12 Depth of Field Depth of field (DOF) is defined as the zone of sharpness before and behind the plane of focus. It depends on distance to subject,
999.13 Infrared PhotographyInfrared Photography is complicated when using digital backs, as the digital back is adjusted to match the viewable light p
Další dokumenty pro Bridge kamery Mamiya 645DFplus

Související produkty a manuály pro Bridge kamery Mamiya 645DFplus
 (40 stránky)
(35 stránky)
(37 stránky)
(8 stránky)

 (64 stránky)
(18 stránky)
(9 stránky)
© 2020, manymanuals.cz. Všechna práva vyhrazena. | 0.037 s |
 Manymanuals.com
 Manymanuals.de
 Manymanuals.fr
 Manymanuals.it
 Manymanuals.pl
 Manymanuals.cz
 Manymanuals.es
 Manymanuals-pt.com
Komentáře k této Příručce